The Scenario
Create a barebones Siri Shortcut that will be exposed in the Shortcuts app.
The Breakdown
This example is unique in that there really isn’t much code, but steps to take in Xcode.
Step 1
Add an Intents Extension to your project: File -> New -> Target.. -> Intents Extension.
Step 2
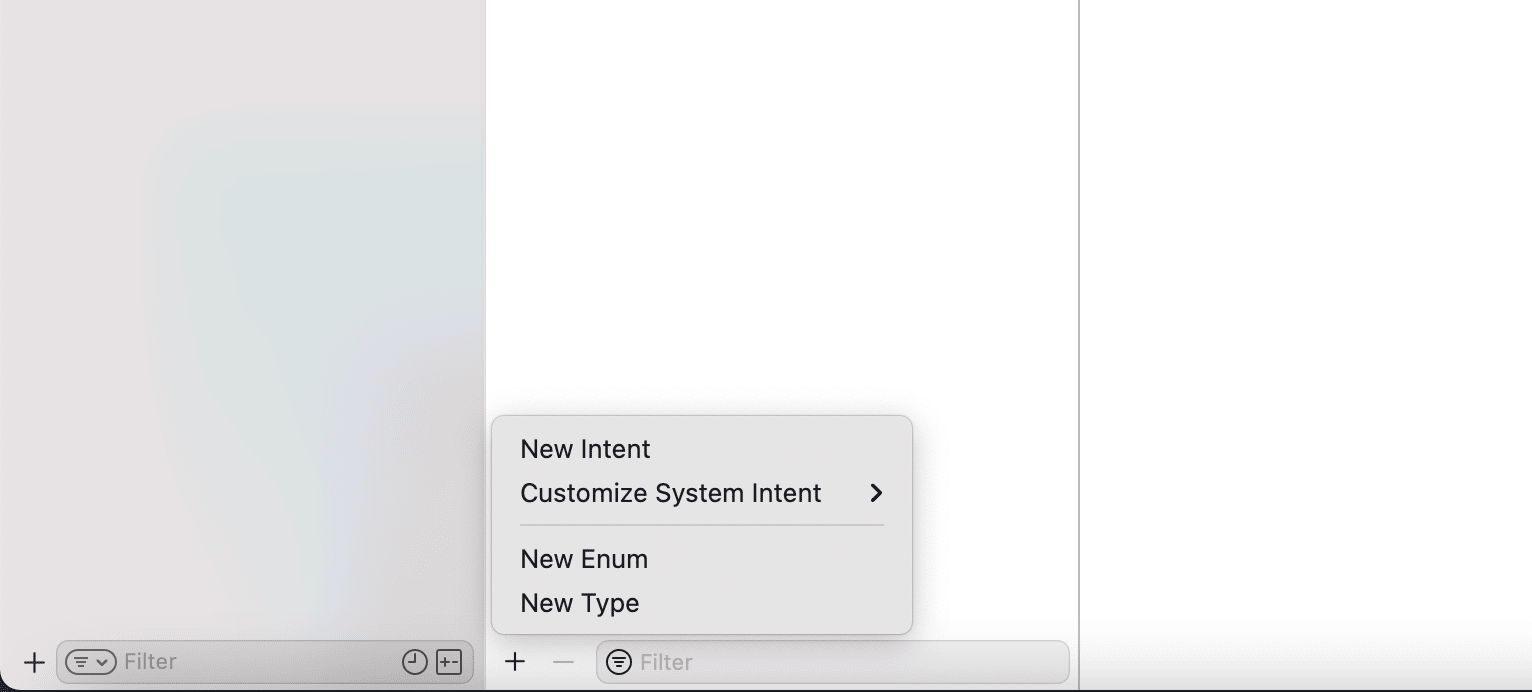
Right click the new Intents extension folder that Xcode generated and add a Intents Definition file: New File... -> Intents Definition.
Step 3
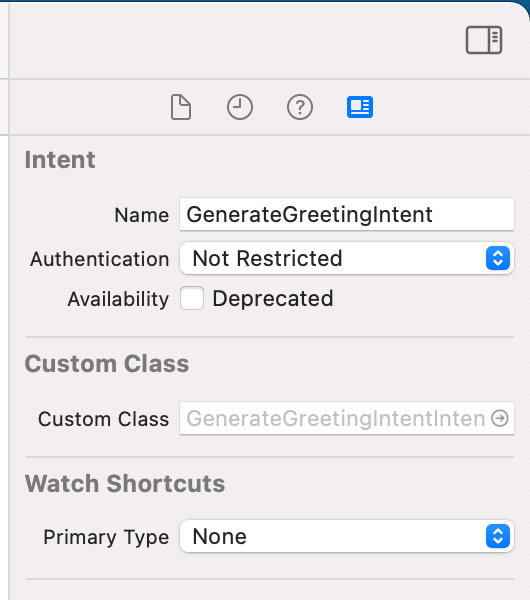
Select the new intent and add a new definition via the plus button:
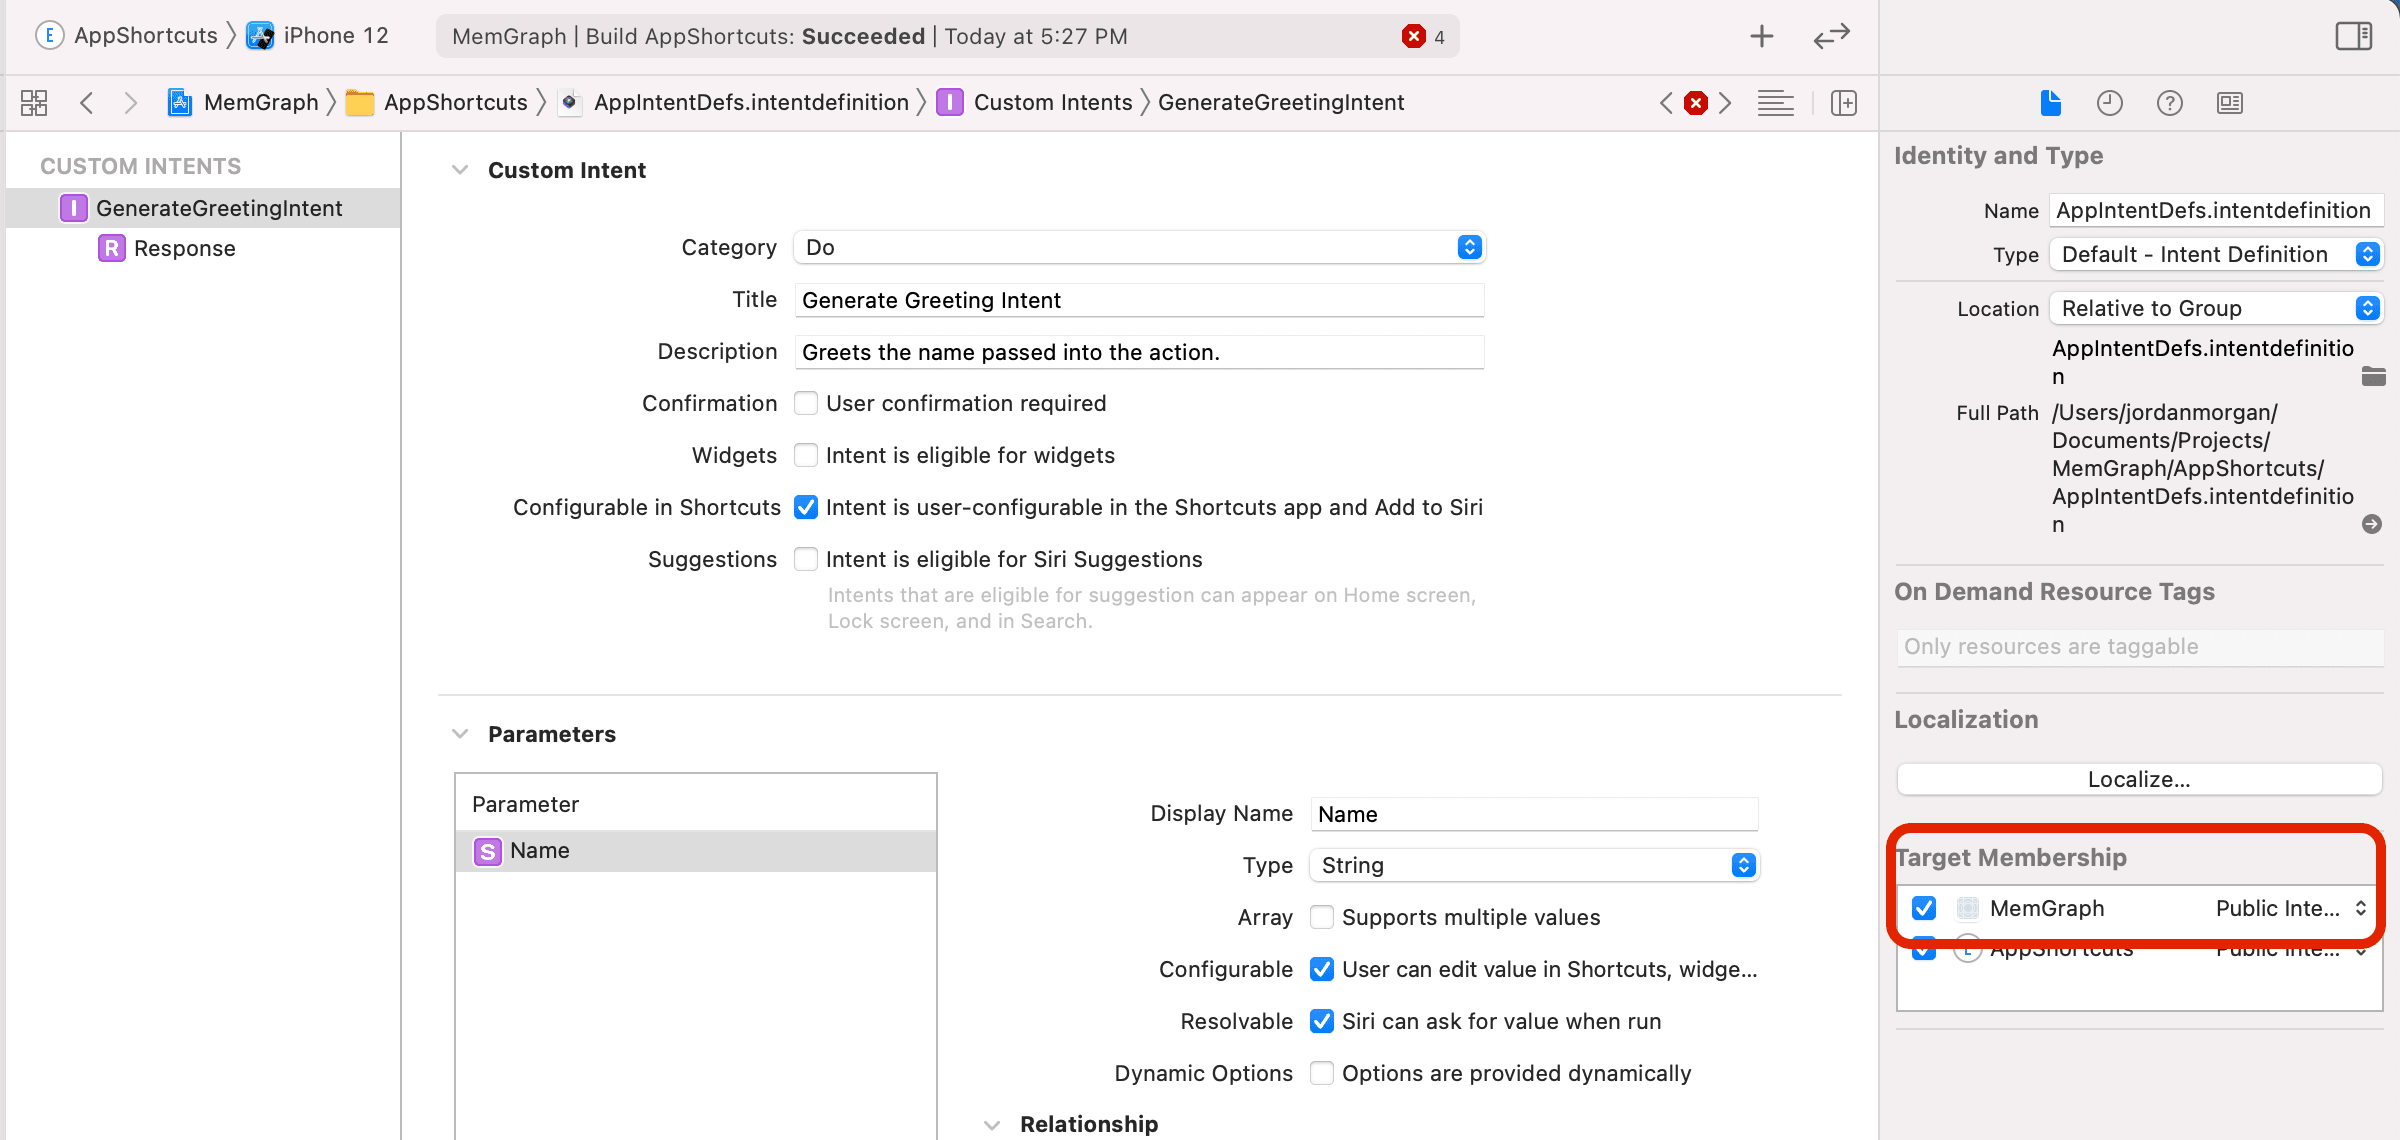
Name it as a verb describing what you’re trying to do with it. Here, we’re just going to have Siri say a greeting with a string that was passed in. So, I’ll name mine “GenerateGreetingIntent”.
Step 4
Select the new intent definition and in the Inspector pane, ensure its target membership also includes your main app binary.
Step 5
Add a new parameter that’s a string called “Name”.
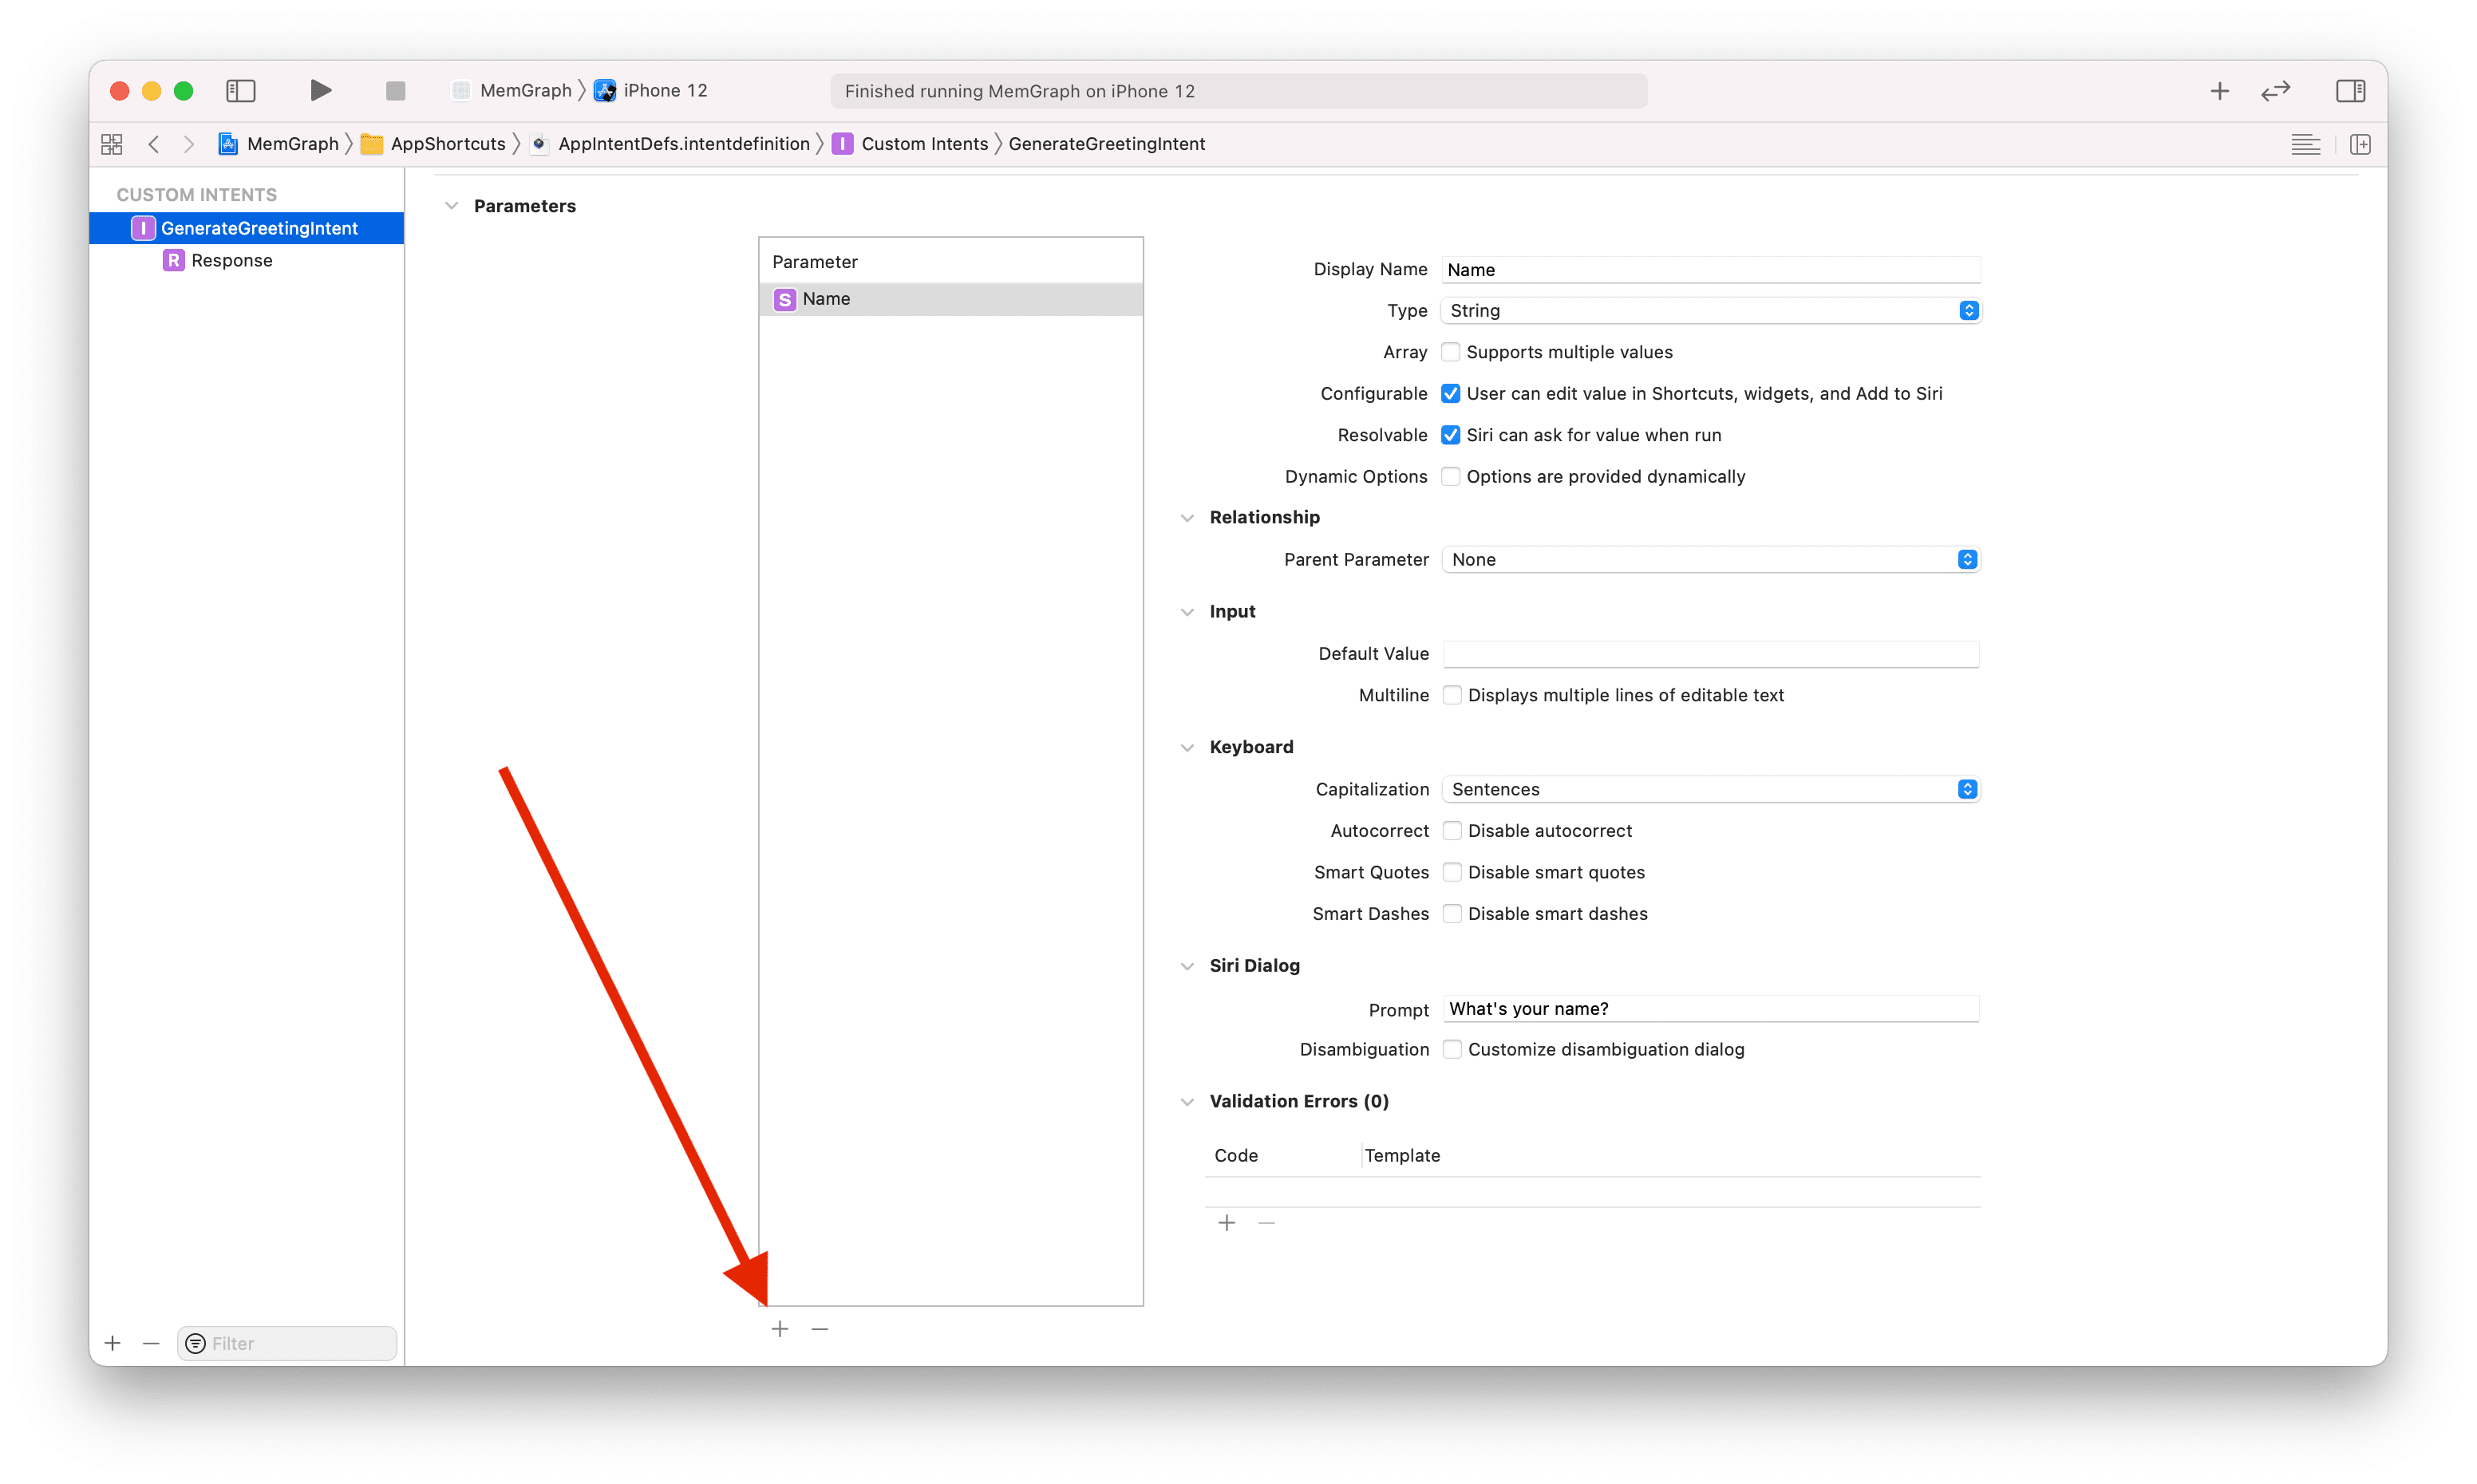
Configure it as such:
- Uncheck “Options are provided dynamically”.
- For
Siri Dialog -> Prompt:enter “What’s your name?”
Step 6
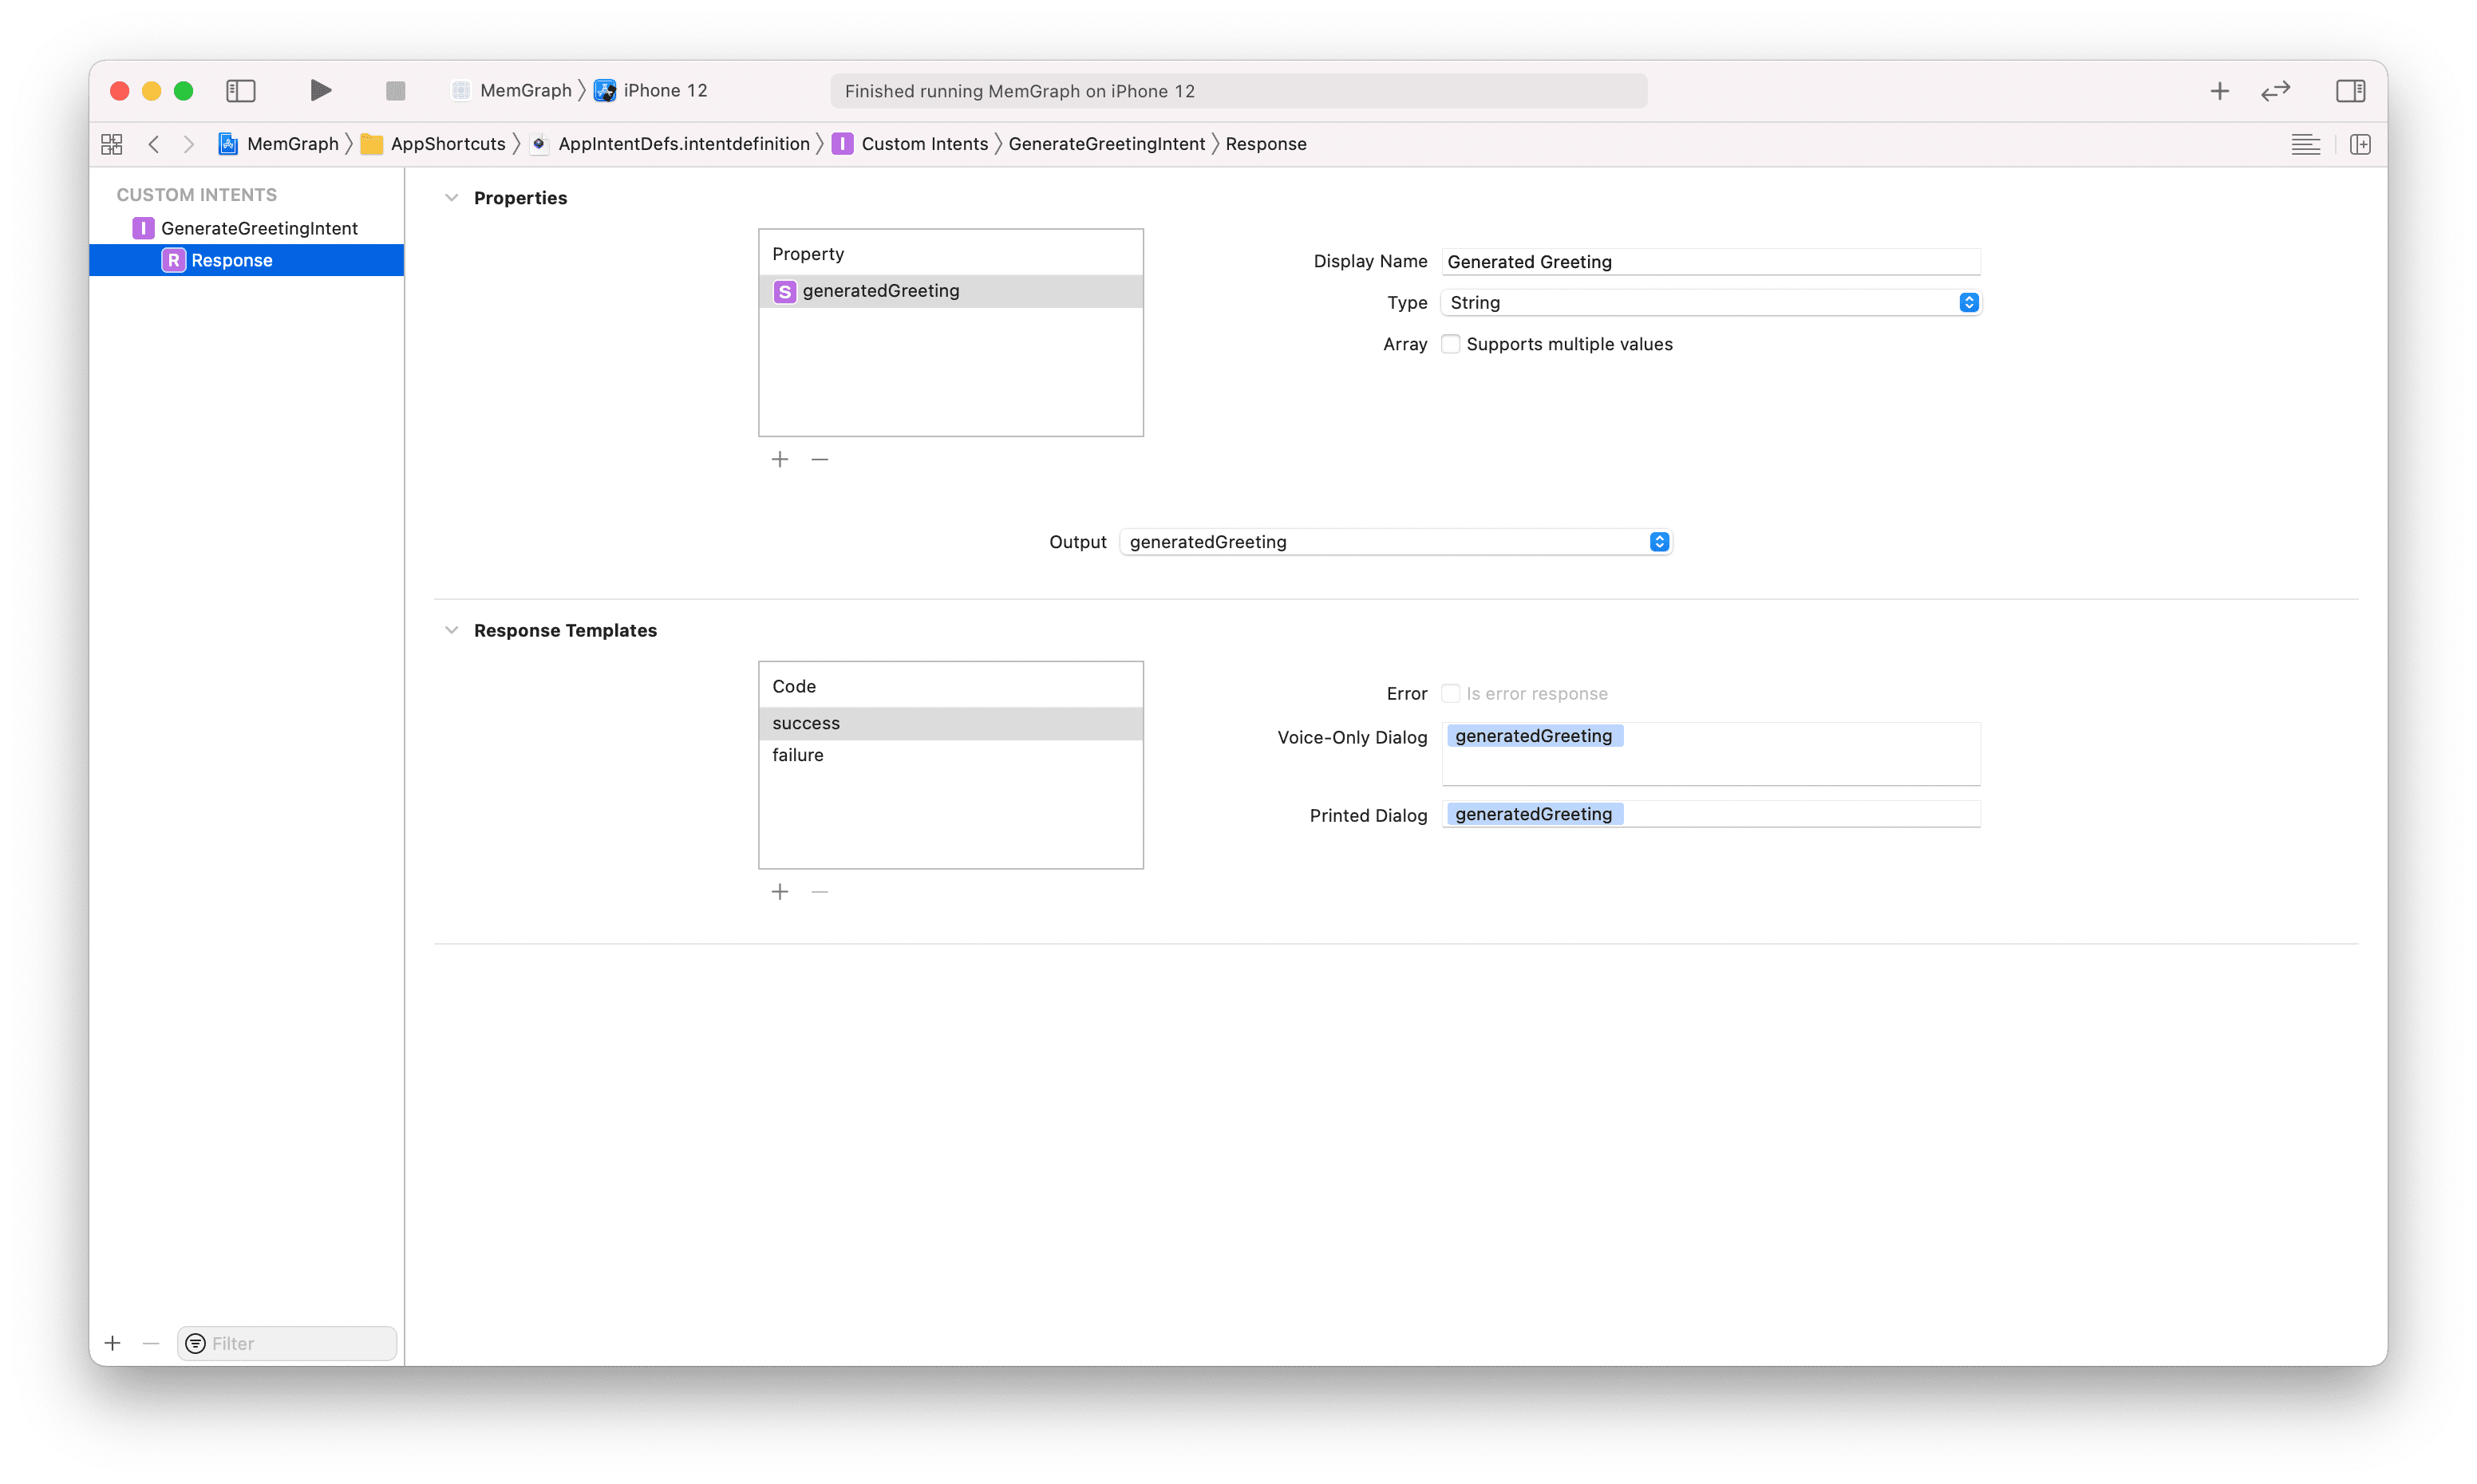
On the left, under “Custom Intents”, you’ll see our intent definition we made that we’ve been editing. Underneath, you’ll see a Response type. Open that now to let SiriKit know what the shortcut will ulitmately result with when it finishes running. Think of this as a return type from a function.
For “Properties” we’ll add a string called generatedGreeting and in the “Response Templates” we’ll have Siri respond with that when the Shortcut succeeds:
Step 7
Open the generated IntentHandler.swift file Xcode generated. If you don’t have one, just add a new Swift file named the same thing.
Delete its entire contents and enter this:
import Intents

// Tell SiriKit who should handle this intent
class IntentHandler: INExtension {
    override func handler(for intent: INIntent) -> Any {
        return self
    }
}

// The actual code to handle the intent we've created
extension IntentHandler: GenerateGreetingIntentIntentHandling {
    func handle(intent: GenerateGreetingIntentIntent, completion: @escaping (GenerateGreetingIntentIntentResponse) -> Void) {
        let greeting = "Awesome Shortcut, \(intent.Name!)"
        completion(GenerateGreetingIntentIntentResponse.success(generatedGreeting: greeting))
    }

    func resolveName(for intent: GenerateGreetingIntentIntent, with completion: @escaping (INStringResolutionResult) -> Void) {
        completion(INStringResolutionResult.success(with: intent.Name ?? "Nameless Wonder"))
    }
}
Xcode can really get confused here and not see the generated protocol for your intent. If that’s the case, click on the intent again and in the inspector you can see the actual generated code by clicking on the arrow under Custom Class to open it, and then copy and paste the protocol name:
If you still don’t see it, the usual things typically work: clean the build folder, clear derived data or restart Xcode.
Step 8
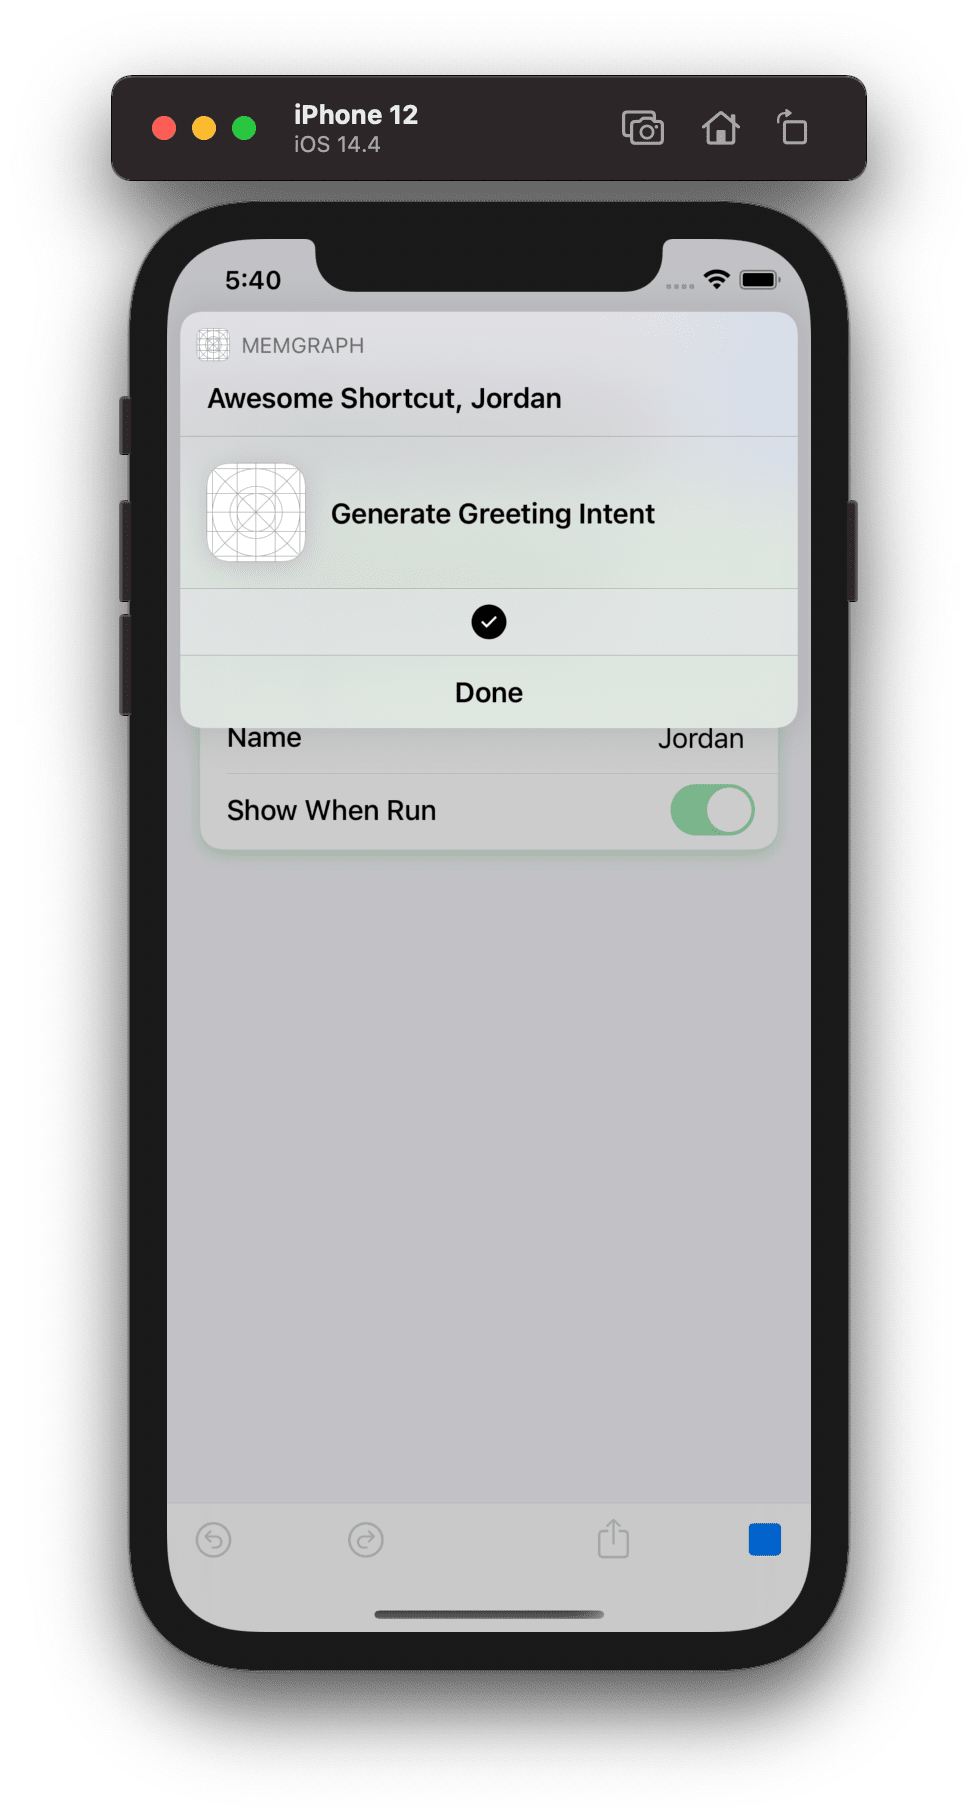
Build and run your app, and in the simulator you should see a full working shortcut. My app in this case is called “MemGraph” so it’ll show under that:

And running it, we see the logic we entered in the intent handler and the results we created in the intent’s Response at work:
Until next time ✌️