Welcome to Modifier Monday! Today’s modifier is containerRelativeFrame(axes:), and its docs are here:
/// Positions this view within an invisible frame with a size relative
/// to the nearest container.
@available(iOS 17.0, macOS 14.0, tvOS 17.0, watchOS 10.0, *)
public func containerRelativeFrame(_ axes: Axis.Set, alignment: Alignment = .center) -> some View
This Modifier Monday will look a little different. Instead of just going to the goods, I want to show two ways we might’ve achieved a similar effect prior to iOS 17. Looking at these approaches first brings about a new appreciation for just how flexible this new modifier is.
Sizing something relative to another thing’s size wasn’t always ideal from an API perspective. For example, you might’ve reached for GeometryReader to drive relative sizing. However, it was always a somewhat “sweet solution”, as the reader itself was a container view which may or may not produce the results you’re actually after depending on the view hierarchy.
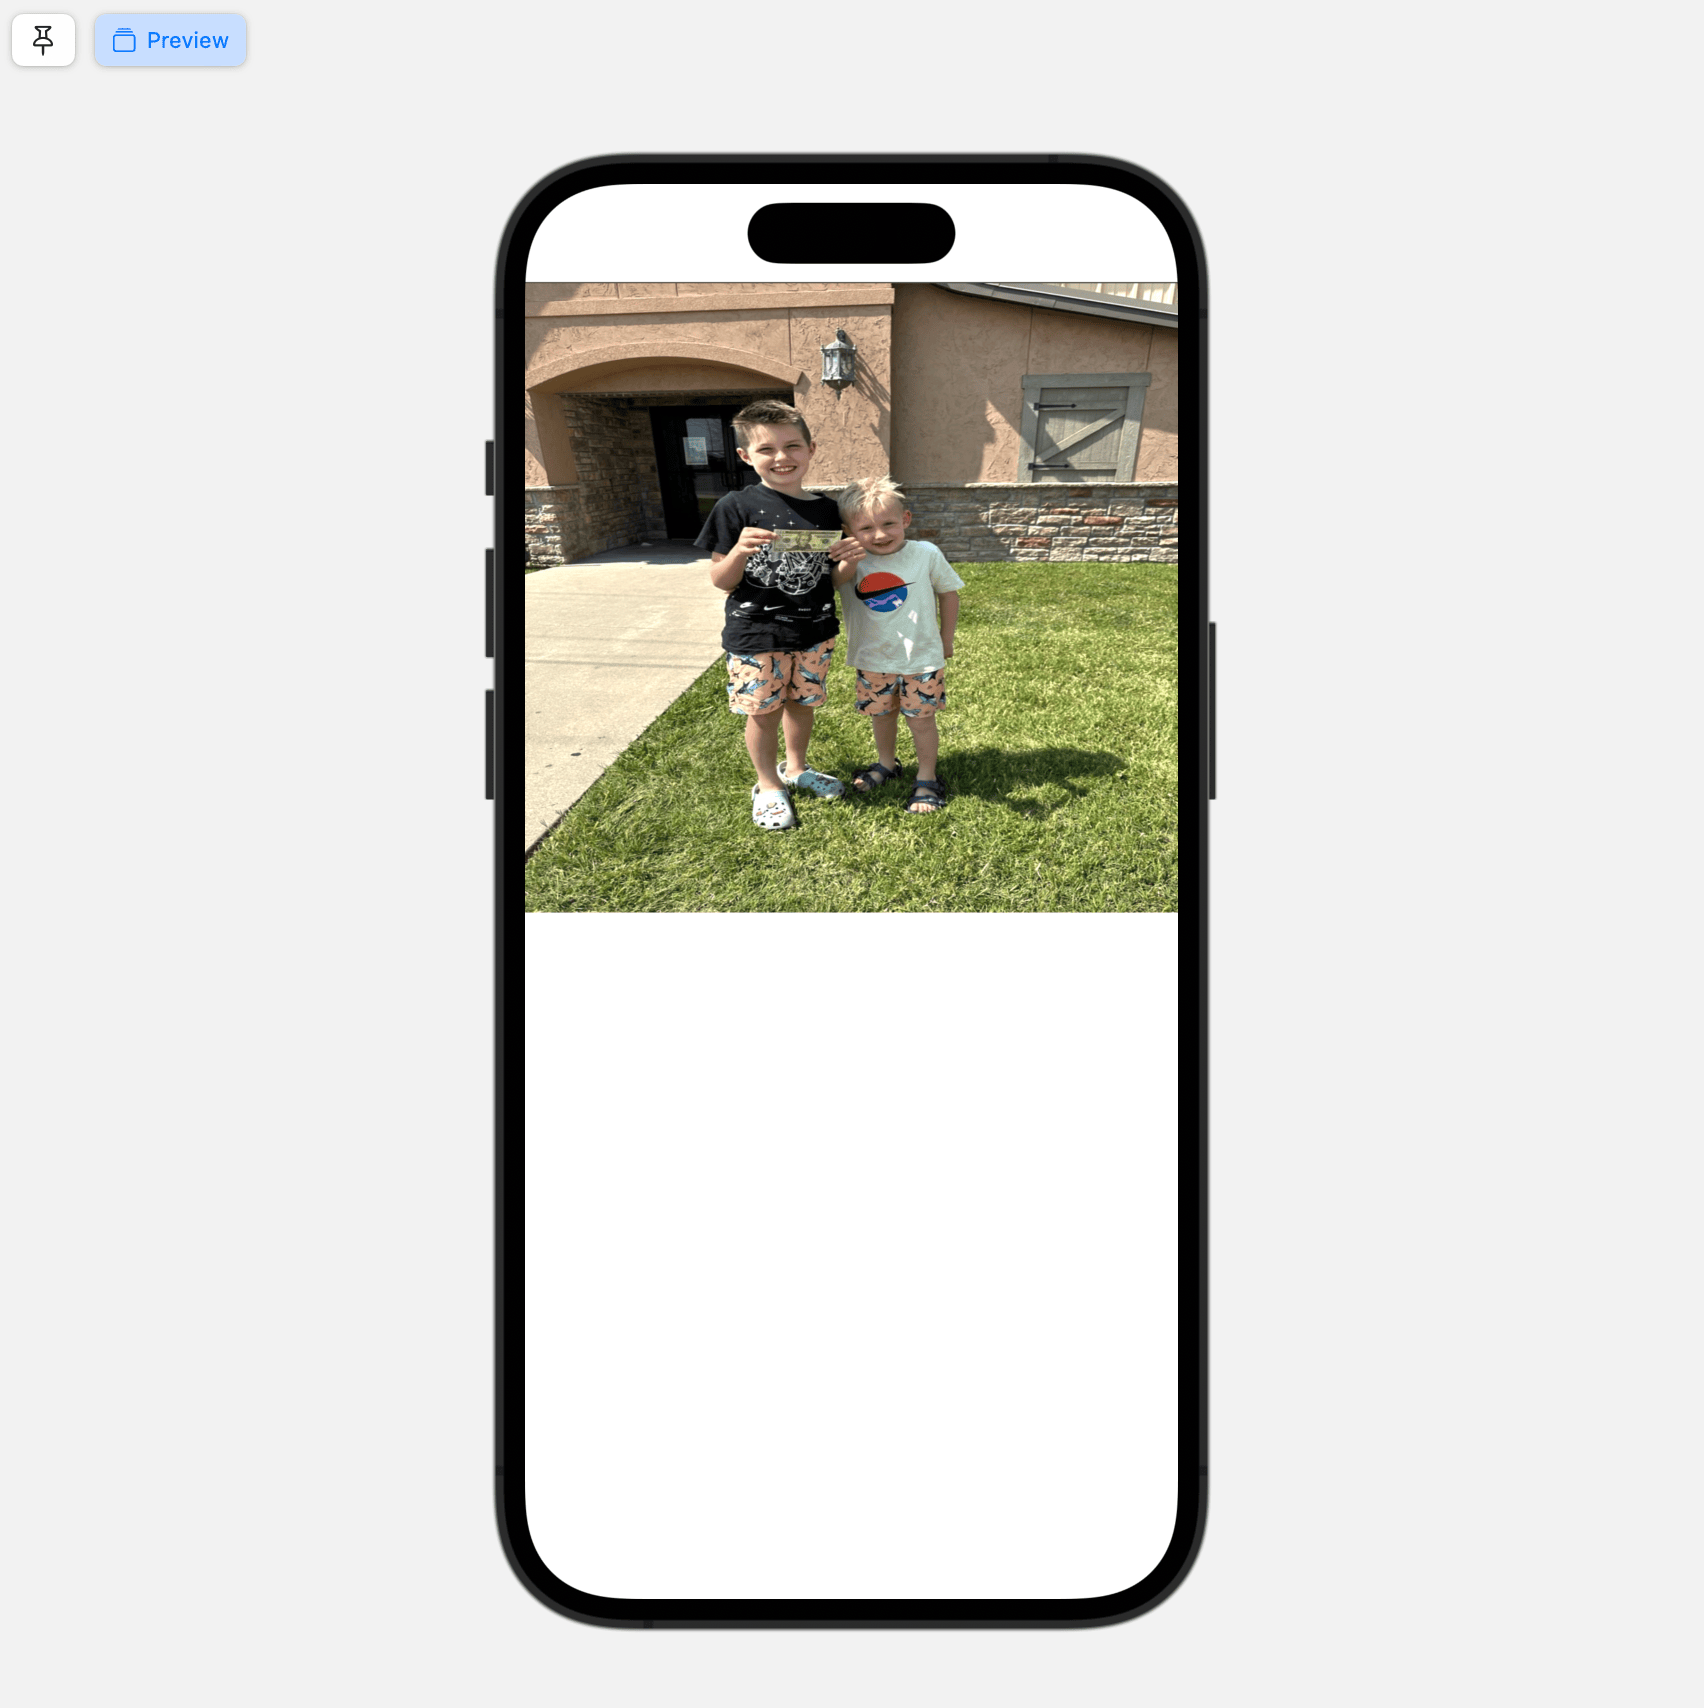
For example, let’s say we had an Image, and for sizing purposes - we want its height to be one half the size of its container’s height. With the GeometryReader in place, you could size an Image in such a manner:
struct RelativeFrame: View {
    @State private var multiplier: Double = 0.5

    var body: some View {
        ZStack {
            Color.clear
            GeometryReader(content: { geometry in
                Image("MaskTest")
                    .resizable()
                    .frame(width: geometry.size.width,
                           height: geometry.size.height * multiplier)
            })
        }
    }
}
Which yields:
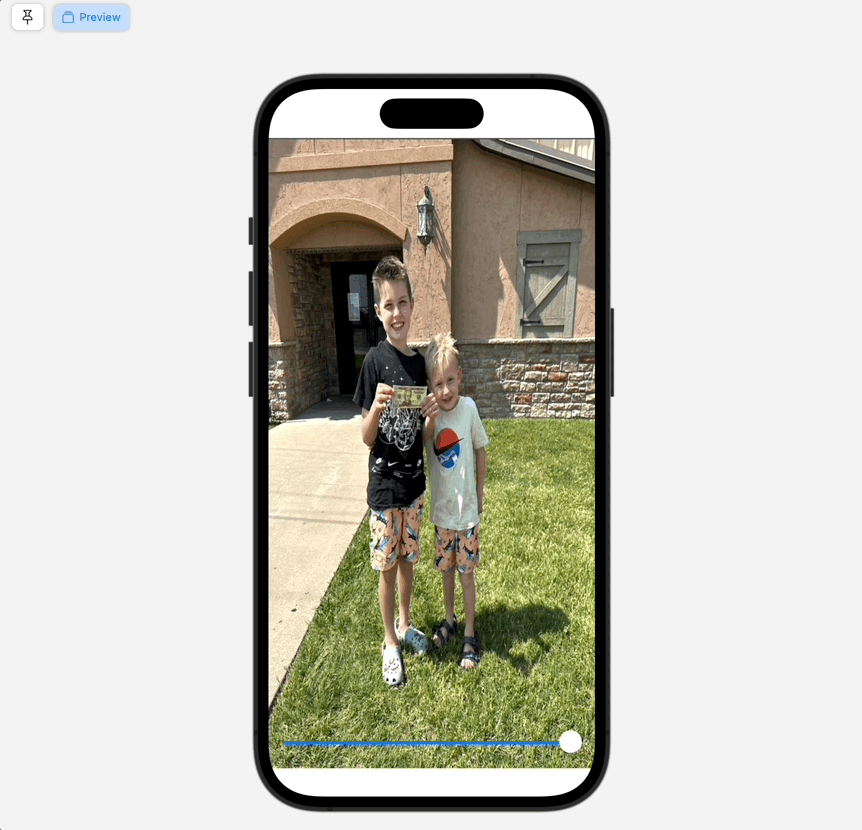
Content scaling aside, it does what we wanted. To see the sizing more tangibly, here’s the same thing - but with a slider to make it’s height relative to the container based off of a multiplier:
struct RelativeFrame: View {
    @State private var multiplier: Double = 0.5

    var body: some View {
        ZStack {
            Color.clear
            GeometryReader(content: { geometry in
                Image("MaskTest")
                    .resizable()
                    .frame(width: geometry.size.width,
                           height: geometry.size.height * multiplier)
            })
        }
        .overlay(alignment: .bottom) {
            Slider(value: $multiplier, in: 0.0...1.0)
                .padding()
        }
    }
}
Let’s see it in action:
However, I don’t need to spend time providing an elucidating explanation over the woes good ol’ Geo Reader can bring on a codebase. To wit, Apple’s own advice in back channel conversations over when to reach for it seem to boil down to, “Don’t.”
Okay, so how about Layout? The powerful API was introduced in iOS 16, and it can be used to achieve a similar result. Look no further than Ole Begemann’s in-depth post over the matter. Here’s the solution from that post (but do read it, you’ll learn quite a bit), demonstrating the approach Ole takes:
fileprivate struct RelativeSizeLayout: Layout {
    var relativeWidth: Double
    var relativeHeight: Double
    func sizeThatFits(
        proposal: ProposedViewSize,
        subviews: Subviews,
        cache: inout ()
    ) -> CGSize {
        assert(subviews.count == 1, "expects a single subview")
        let resizedProposal = ProposedViewSize(
            width: proposal.width.map { $0 * relativeWidth },
            height: proposal.height.map { $0 * relativeHeight }
        )
        return subviews[0].sizeThatFits(resizedProposal)
    }
    func placeSubviews(
        in bounds: CGRect,
        proposal: ProposedViewSize,
        subviews: Subviews,
        cache: inout ()
    ) {
        assert(subviews.count == 1, "expects a single subview")
        let resizedProposal = ProposedViewSize(
            width: proposal.width.map { $0 * relativeWidth },
            height: proposal.height.map { $0 * relativeHeight }
        )
        subviews[0].place(
            at: CGPoint(x: bounds.midX, y: bounds.midY),
            anchor: .center,
            proposal: resizedProposal
        )
    }
}

extension View {
    public func relativeProposed(width: Double = 1, height: Double = 1) -> some View {
        RelativeSizeLayout(relativeWidth: width, relativeHeight: height) {
            VStack {
                self
            }
        }
    }
}
If we plug that in, it achieves the same result as before:
struct RelativeFrame: View {
    @State private var multiplier: Double = 0.5

    var body: some View {
        ZStack {
            Color.clear
            GeometryReader(content: { geometry in
                Image("MaskTest")
                    .resizable()
                    .relativeProposed(height: multiplier)
            })
        }
        .overlay(alignment: .bottom) {
            Slider(value: $multiplier, in: 0.0...1.0)
                .padding()
        }
    }
}
Examples
While that is certainly impressive, wouldn’t it be great if we didn’t have to reach for GeometryReader or implement or own custom Layout? This is obviously hook, line and sinker for what containerRelativeFrame() can bring to the table.
Once more, let’s achieve the exact same thing as we’ve been doing (scaling an Image height based off of a multiplier, relative to the size of a container’s height) using it:
struct RelativeFrame: View {
    @State private var multiplier: Double = 0.5

    var body: some View {
        ZStack {
            Color.clear
            Image("MaskTest")
                .resizable()
                .containerRelativeFrame(.vertical) { length, axis in
                    return length * multiplier
                }
        }
        .overlay(alignment: .bottom) {
            Slider(value: $multiplier, in: 0.0...1.0)
                .padding()
        }
    }
}
And that’s it, we’d get the same result as the .gifs above.
Using this flavor of .containerRelativeFrame, we provide its axis to operate on (vertical) and within the closure we get two values (the width or height of the container based off of the axis). This easily allows us to scale the image based on the Slider control.
If we didn’t care about the slider or variable sizing, though, the code is even simpler:
// Just the `Image` code for brevity...
Image("MaskTest")
    .resizable()
    .containerRelativeFrame(.vertical)
The best part?
This modifier won’t muck up your view hierarchy. The view is created via an invisible frame, itself the size of the nearest container.
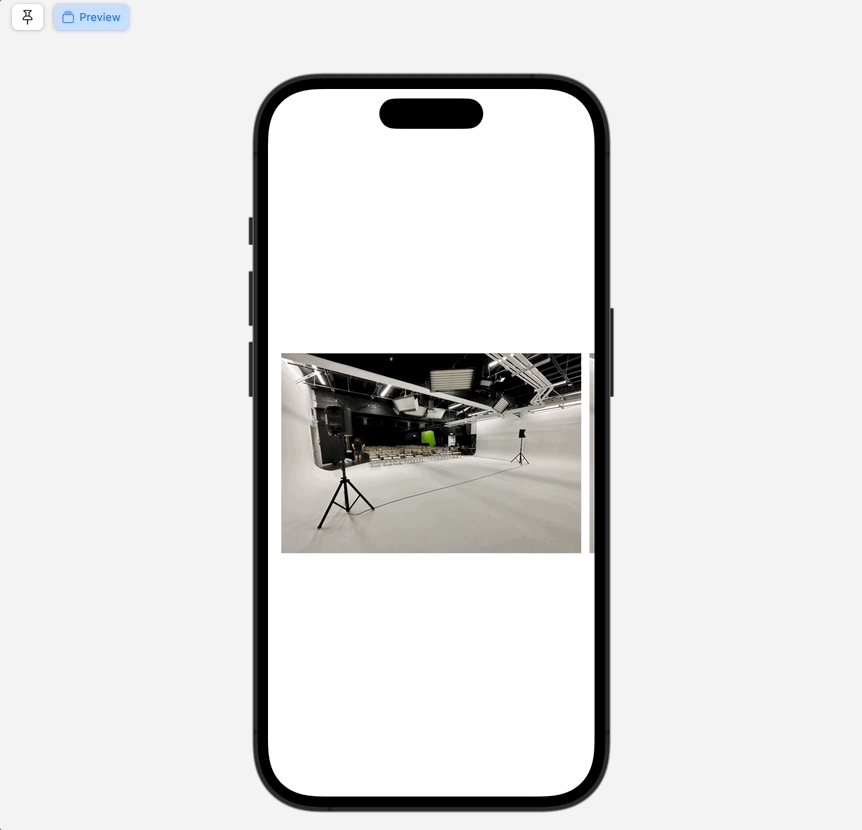
Of course, a natural use case for this could be a paging scroll view:
struct RelativeFrame: View {
    var body: some View {
        ScrollView(.horizontal) {
            HStack(spacing: 10.0) {
                ForEach(0...10, id: \.self) { _ in
                    Image("studio")
                        .resizable()
                        .aspectRatio(3.0 / 2.0, contentMode: .fit)
                        .containerRelativeFrame(.horizontal)
                }
            }
        }
        .scrollTargetBehavior(.paging)
        .safeAreaPadding(.horizontal, 16.0)
    }
}
…wherein each Image is set to the size of the nearest container, perfect for gallery like experiences:
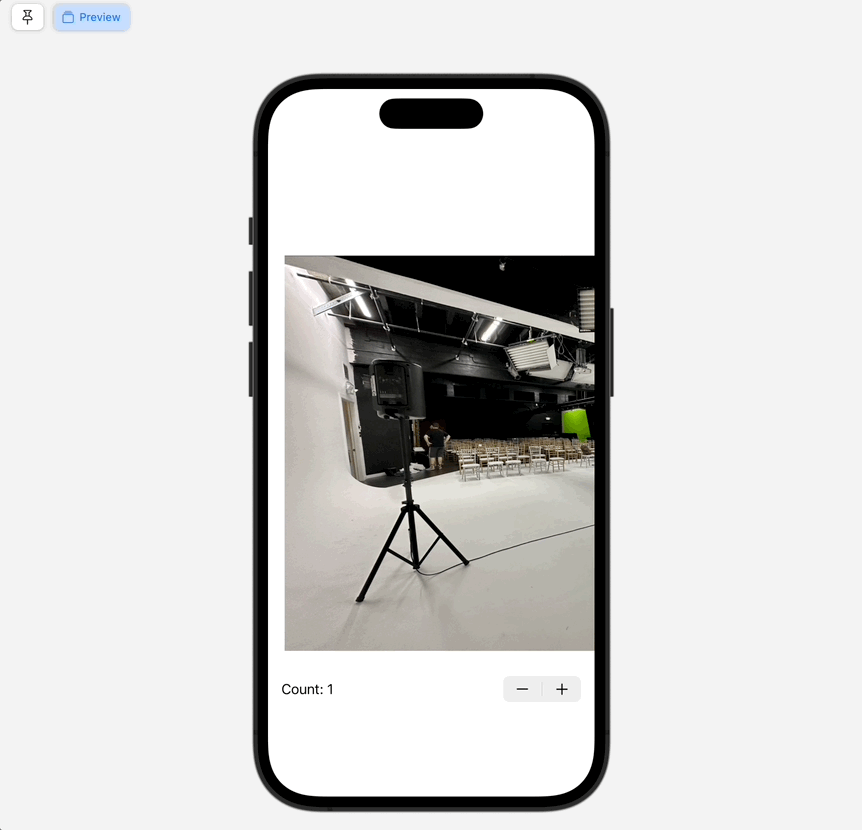
This modifier has a few more tricks up its sleeve, but my goodness - if I didn’t have to rewatch this dub dub session 44 times to fully understand how it actually works. To that end, you can provide a count with spacing. Stay with me, and read this code through:
struct RelativeFrame: View {
    @State private var count: Double = 1.0

    var body: some View {
        ScrollView(.horizontal) {
            HStack(spacing: 10.0) {
                ForEach(0...10, id: \.self) { _ in
                    Image("studio")
                        .resizable()
                        .aspectRatio(3.0 / 2.0, contentMode: .fit)
                        .containerRelativeFrame(.horizontal, count: Int(count), spacing: 8)
                }
            }
        }
        .scrollTargetBehavior(.paging)
        .safeAreaPadding(.horizontal, 20.0)
        .overlay(alignment: .bottom) {
            Stepper("Count: \(count.formatted())",
                    value: $count,
                    in: 0...10,
                    step: 1,
                    onEditingChanged: { _ in

            })
            .padding(.horizontal)
            .offset(y: 61)
        }
    }
}
Okay, so basically we’re incrementing a count variable with a stepper. That count corresponds to the count parameter in the relative frame modifier. Then, we tack on 8 points of spacing. So what exactly does count do? Well, it’s much easier to understand it by seeing a .gif:

Ahhh, nice. So basically, this divides up the relative frame’s axis based on its count value. So, if the count is 2 - we’re saying “Size two images at a time within my container’s width, and use the spacing provided.” Also, with our paging modifier, it means that we get a nice paging result that snaps between count views at a time.
Great! But now, what if we add in this modifier’s last supported parameter, span:
.containerRelativeFrame(.horizontal, count: 1, span: 2, spacing: 8)
Sooo…what happens now? Again, we turn to the power of the .gif:
…and we can see that span is saying “This is how many rows (vertical axis) or columns (in a horizontal axis) the view should take up.” Let’s break it down to wrap things up:
.containerRelativeFrame(.horizontal, // Using columns
                        count: 1, // Show 1 view at a time
                        span: 2, // And make each view two columns wide
                        spacing: 8) // And give 8 points of spacing
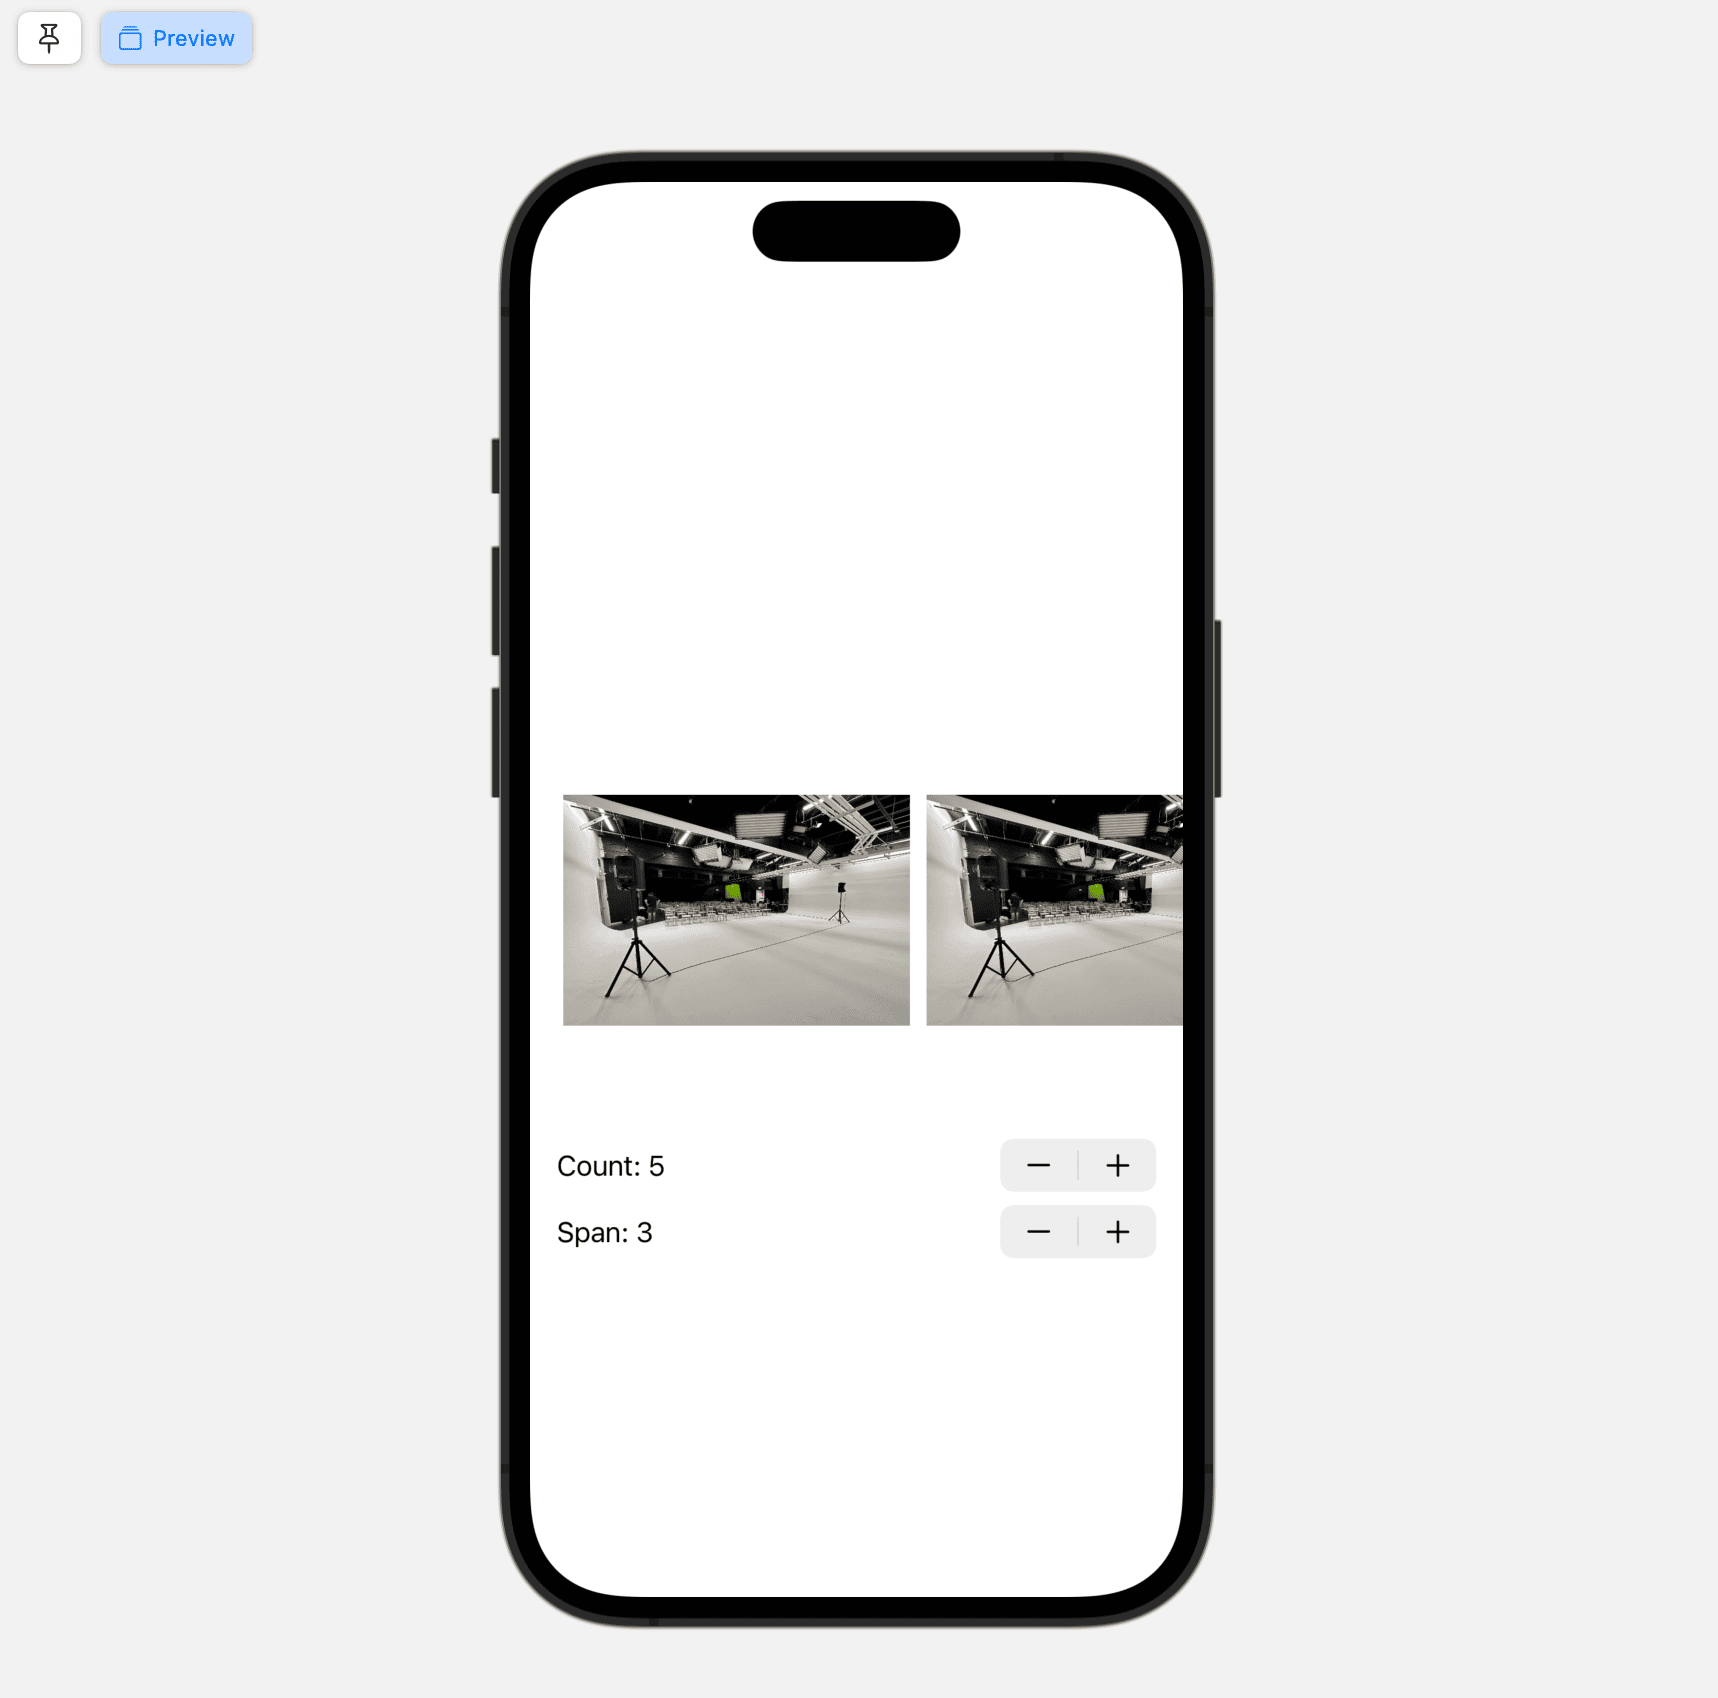
With those comments, hopefully it’s clear why it took two swipes to see the full image (i.e. two column width). What this really boils down to are essentially CSS Grid ratios. You’re saying “I want each view to be span by count in size on the given axis.” If we wanted each Image above to take up three fifths of the container’s width, we’d write this:
.containerRelativeFrame(.horizontal, count: 5, span: 3, spacing: 8)
Voilà. Each Image width is equal to 3/5’s of the container’s width:
So that’s containerRelativeFrame. A do-it-all modifier for all of your relative needs.
Until next time ✌️.